Tuesday, April 27, 2010

Blogging at Town Meeting

I'm at Town Meeting, paying enough attention to know what the article is about, and how it works, but keeping my distance enough so that the contention of this article doesn't bother me! TM is at our high school, with school-wide WiFi. I had some difficulty getting on, but finally got network diagnostics to tell me that I had a bad network account being used, so I told it to set up a new one, and that worked. (the questions are getting to the place where I'm really glad I have this to distract myself!).

Now, as for the atarah, it's off!

DSC02046

All of a sudden it looks much better, doesn't it? That is always reassuring. I always worry that when something comes off the frame, that it will shrivel up and look like crap. It didn't!

I was also worried that there would be a crookedness problem, because I did this in my preferred "folk style" method, rather than the modern overly drawn, "perfect" stitching version, which I hate working. My method is more fun, but there is a bit of a sense of living dangerously!

I had to do a bit of tweaking, but it worked.
DSC02047

It's pretty straight! I wish I could take a photo of the whole thing!

DSC02048

I love how the colors just glow on the blue background.

DSC02045

This works! I love not seeing the raw edges...

I basted the edges under and now, it's all wet. I used a washable chalk pencil to mark the flower spots and the stem shapes. There are a few white areas here and there. So I gave the atarah a good soaking, and it's hanging to dry in my sewing room. It'll need steaming after that to puff up the petals, which got somewhat crushed while wound on the the frame.

Tonight, I have a large piece of white silk to hem, then I get to knit!

Monday, April 26, 2010

Atarah embroidery is DONE!

At Town Meeting tonight, I finished the embroidery!
IMG_0139
I have something of a reputation...people alwasy come over to see what I'm working on, at TM. I've never brought a frame quite this big before. One year I fit my DD with an en fourreau 18th C gown, I've knitted, done bobbin lace (smaller stand for that), sewed, made buttons, but never lugged something quite so large! Yes, this photo really is at Town Meeting, from tonight! It's in the Caf, at CCHS. The main moderator is in the Auditorium, but that room has uncomfortable seats, too formal, and bad light. So I sit in the Caf which is slightly less formal, people can bring an infant, or a quiet school aged kid, and it's lighter, and you can eat. So I sit there, spread out whatever project I've got, and get lots of work done! Lots of people bring laptops, now that the school has wifi.

But the really great thing tonight (other than the embroidery, which follows), is that my daughter, Wendy was there. She's 18, so this was her first real TM. She went a lot last year, and helped out, running errand for her dad (who is the Head Teller) and anyone else involved in running TM who needed something. This year, since Abe needed more tellers, Wendy got drafted. That means that the first thing she actually did at her very first TM was stand to get sworn in to count votes impartially! I saw her on the monitor as we got sworn (I'm a teller, too, and she sat in the auditorium), and was no end pleased.

Just at the end of the last article, I was redoing that too larger flower. I had to finish it off at home, but I had finished the last hex, unrolled it all, and then remounted it to fix the too-large flower in the second hex. Everyone around me was watching...it was boring...school stuff that was clearly big cuts, was going to pass, but we had to sit through the presentations. Sometimes it's just the process that counts, that knowing we had to do it this way, makes the schools do a careful job with their presentations...doing it is important, but it's still boring! So people watched me paly with my pretty flowers.

IMG_0140

It looks ok, here, (bad iPhone photo...too fuzzy), but really, it's bigger than the others.
DSC02030

See? It's the second hex from the left, upper left. Ick.

So...this is what happens to icky flowers:
IMG_0141

Take that!

Now that I've redone it, twice, it looks fine. Photos tomorrow. Way too late to touch anything that I can screw up, right now!

At TM tomorrow, I imagine I'll be hemming and appliqueing, unless I get that done during the day, in which case I might be embroidering the little blossoms on the corner squares. Then appliqueing the squares down...the end is in sight!

Sunday, April 25, 2010

What 2/3 looks like

Four hexes are done.
DSC02030

This is boring...it doesn't look much different than three.

Now I've also finished up the last 2 hexagons' stem stitching, but that is even more boring to look at!

DSC02031
Reasonably nice flowers, not sure yet if I'll have to tweak any of them.

DSC02032
This one is my favorite flower, even though it's not coral!

DSC02036
Ok, I like this one a lot, too!

Off to finish up the French knots, in the hope that I can do 12 ribbon flowers before Town Meeting starts tomorrow.

Saturday, April 24, 2010

Fencing Baby Jacket

DSC02026

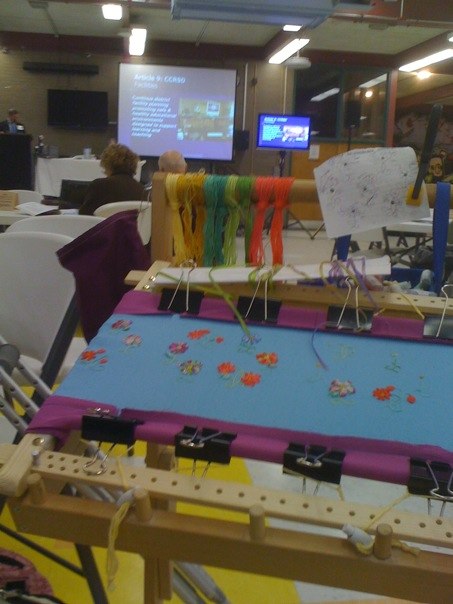
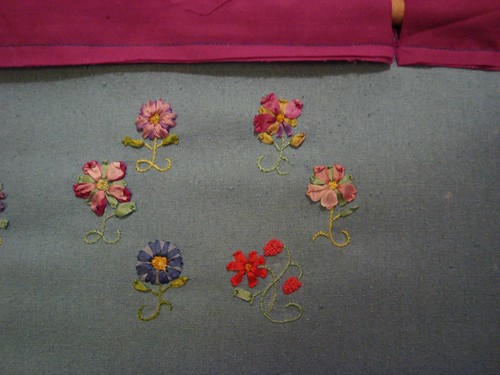
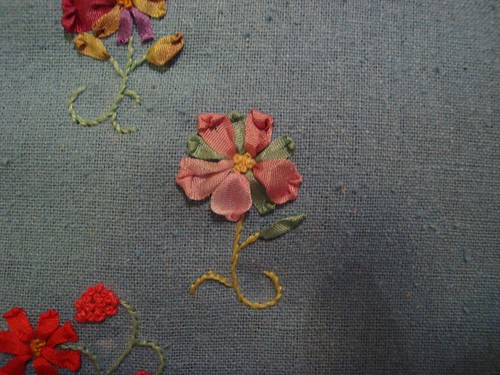
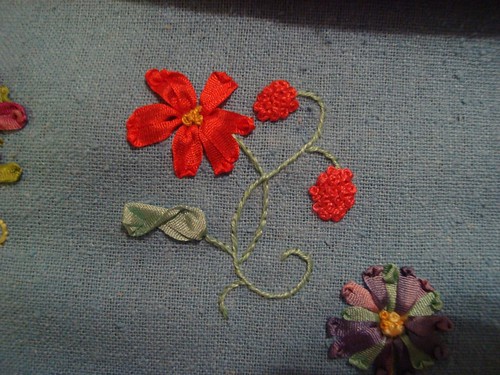
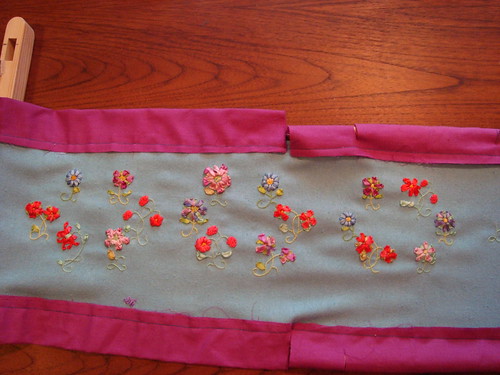
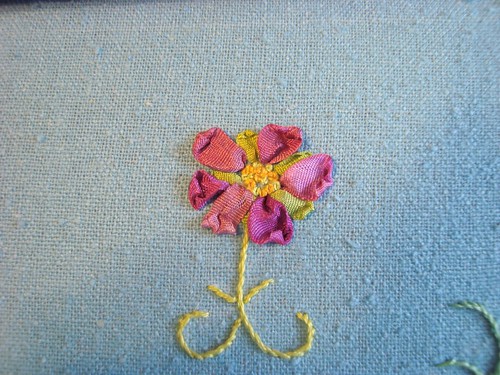
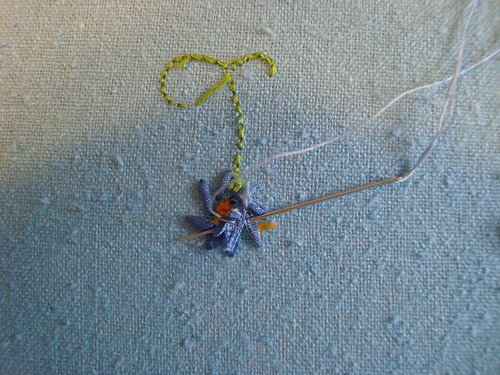
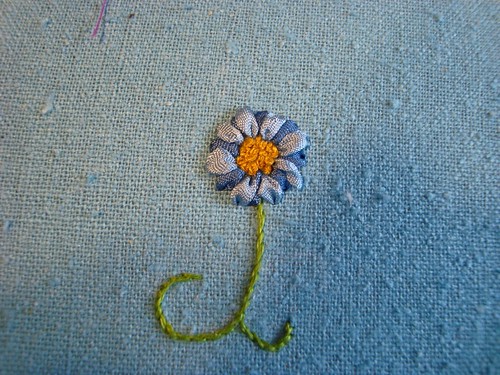
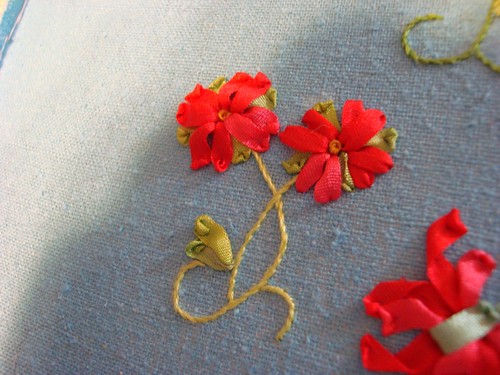
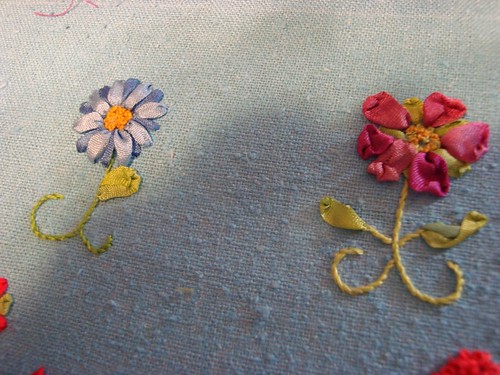
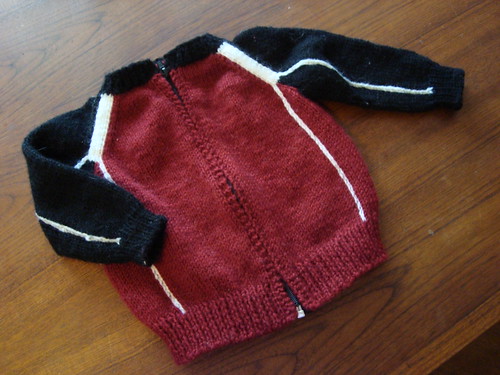
In the time honored tradition of procrastinating doing something you don't want to do (embroider) by doing something you have been putting off, I finished up the baby sweater for Teddy's fencing teacher this morning.

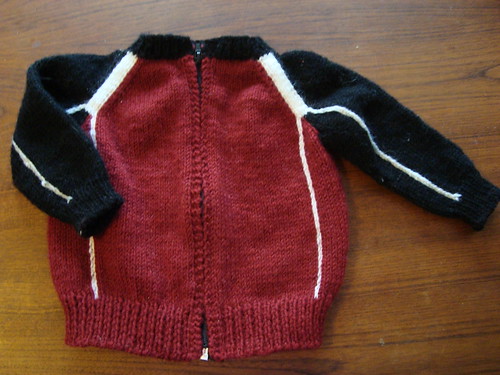
Teddy's jacket is a raglan, zippered, color blocked, piped, warm up team jacket. The body is a marroon, sleeves are black, with white along the raglan lines one the sleeves, with piping along what would be the princess seam lines in a woman's dress, and matching piping on the sleeves.

One of Teddy's coaches, Ariana, had a baby back in December. One day, while idly looking at Teddy, which, of course, means looking at that jacket, since if he's awake, he's wearing it, I realized it was a raglan, and that it would be easy to copy as a baby sweater...so who could resist that? Off to the yarn store for Plymoth Encore yarn. I wanted DK, and I would enlarge mom's baby sweater pattern a bit. Since the shop I went to didn't have DK Encore, I got the worsted, and thought I'd kluge it. Then I talked to my Mom. Always a good idea, since she told me she'd made that sweater in worsted, and it turned out to be a 12 mos size, you only have to lengthen the pattern, not change it otherwise.

There were, of course, challenges. The pattern is top down, made in one piece. So after the black neck, I had to have the maroon front, a bit of white, then black, then white, then the maroon back, then white, black, white, and the other maroon front!

If I worked consistently in one place, picking up and putting down the work carefully, there were no tangles, since this was intarsia. But if I put it in my work bag, and brought it anywhere, then I had to guess at which way was up, and if I had to turn it the other way first. I never did manage to really figure out what it looked like with only one twist, to turn it the right way around. I kept thinking that that should be simple to figure out, but I didn't manage to do that. So I had to untangle it every so often.

It got easier once I dropped the sleeve stitches, since I only had the body maroon and the 4 piping lines. Each line of piping was just a single 2-yard-long strand, that I could pull out as I worked it. No tangles there. They slowed down the rows a smidge, but were easy enough to work. Doing the sleeves was the same, each sleeve had two piping strands, but where easy to work...they just took forever! I tried to work the sleeves with a magic loop, but it kept making me nuts. Of course, since I was working with my acrylic circular tips, I couldn't use two circs, because I only had one pair of them, and I know that if I used wood or metal tips for the second circ, I'd have strange lines, because I really knit differently with the different needles. I finally remembered that I could use the right tip as a acrylic, and the left one as a smaller needle, and it would work out. So I put together two needles like that, and that worked. It would have been even more clever to remember I'd done that, so that I would have remembered that I did, indeed, have the necessary tips to work the ribbing when I was at the parade, rather than have to wait to get home to finish the sleeve! But I got a lot of Abe's hat done then.

To install the zipper, I made a black chain and whipped it along the zipper tape with regular thread. I started at the bottom, having woven in the tail into the back of the chain. I carefully stitched the bottom of the chain to the hard bit of the zipper tape, very securely, since the bottom and the top tend to have the most stress. I wipped the chain to the tape with about two sts per chain, along the zipper side of the chain, lining it up with the lines on the tape. I make sure to not twist the chain and to make sure it was not at all stretched, so that the zipper tape would stay flat. I made sure to sew from the bottom on both tapes, although one is more awkard than the other. At the top, I undid the tail, and frogged it back to just the right length, then ended it and wove the tail in, and then stitched the top securely. I folded the top flaps back, and stitched them down, but you have to keep the inner edge far away from the zipper teeth, or it won't zip smoothly.

To sew the zipper in, I matched the top and bottom and used those clippy barrettes to hold it in place.

DSC02029
I picked a line of sts on the inside, and followed up, stitching in maroon from the black chain to the jacket insides.

DSC02027
Mostly I stitched under every other row on the inside, but occasionally did a few more stitches than that. I had to follow a column one stitch further out at the ribbing, to get it to match the top. I'm not exactly sure why, but that made it even, so it worked. Of course, I had to do the second tab a second time, to make the two zippers match more closely at the neck, but it worked. The garter stitch on the jacket's left side appears to be a tad smaller than on the right but I think that is because of how I stitched it. I used the same vertical row on each side, but there must be something about my tension that was off. I (briefly) considered worrying about it, but decided I was sick of the jacket and that I didn't care. I know a few people who would notice it, but, well, as Elaine says, "Done is better than Perfect."

DSC02028
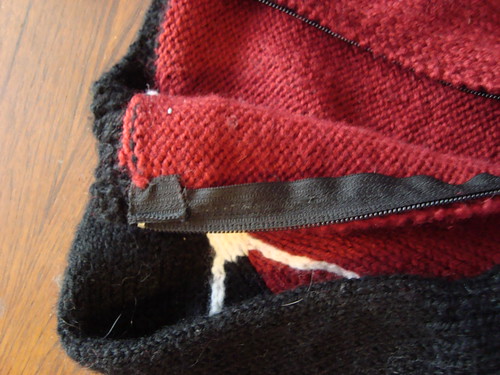
I did use sewing thread to tack down the zipper tape at the neck, and make the tops match perfectly....it was easier than redoing it about 100 times with the yarn, and only took a couple of minutes.

DSC02025

I love it.

Embroidery Chugs Along

Here are some pictures from last week. I've done one more hex than this...two more to go!

DSC02016
3 complete hexes. I expect to go back, when the whole thing is done, and tweak some of the flowers, for balance.

DSC02014
I just love the potential when just the stems are embroiderd.

DSC02013
The red flowers are my favorites. I wish I could make all the flowers red, but then they wouldn't show up and be special.

Except for occasionally blowing it in size of flowers, this is going pretty well. Well, also except for when I try to end off a leaf stitch and pull it though. Ending of silk ribbon is Not Fun. The ends of ribbon on the back have to be stitched together with regular sewing thread, just weaving them in doesn't work, they are large, flat, slippery, and bulky, especailly if twisted or knotted. So they get carefully trimmed and overlapped, then sewn together. I start by leaving a tail on the right side, then, when I'm done, I pull that to the back, and stitch the ends to the underside. But sometimes I pull the wrong bit, and instead of a tail popping to the back, the tip of a leaf stitch drops back. A leaf stitch is what I used most, you lay the ribbon along the surface of the work, and then poke the needle through the ribbon, forming that little fold at the tip of the leaf or petal. But if you poke it through to the back it's ugly! And undoing it is hard, because the ribbon is stitched through itself, there is a hole and a folded knot-like loop. If I'm VEEEERY careful, sometimes I can use a blunt needle to loosen it and undo it, and then if I'm even more careful, I can restitch it. Sometimes.

This means that after I undid and redid the leaf stitch that I just yanked on, when I went to end it off, yanking on it again meant a cup of tea before proceeding. I hate when I make the same mistake several times in a row. At least my grandmother (Grandma Downstairs) taught me that when those feelings happen, I should stop my work and go make tea. Grandma got me addicted to caffeine when I was about 10 and she was teaching me to sew! I distinctly remember the first really nasty sewing machine jam I got, and I was getting frustrated, clearing it, so she made me stop and have tea with her. Those were two of the best things she taught me...to clear the jams (notice she wasn't doing the clearing?) and tea!

Next up will be drawing the last two hexagons! I'm getting faster at these flowers, they should be done in a few days, and I can cut out the tallit itself!

Wednesday, April 14, 2010

Procrastination

See me mend Abe's breeches...Battle Road is on Saturday...and Harry needs a lining and knee bands moved down, as well as shirt cuffs.

So, lets list all the cast ons I can think of. Why? Because people on Rav were talking about them.

Invisible provisional (waste yarn, wind working yarn over and under)
backward loop
backward loop with extra twist (german twisted precursor)
longtail
thumb variation LT
lefty longtail (true mirror)
lefty longtail (as I actually do it, combo style)
German twisted
German twisted lefty mirror
German twisted lefty combo
Channel Island
crochet provisional
double needle standard
double needle longtail
cable
knitted on
wind on, knit through back loop
tubular
Jeny's suprisingly stretchy
Judy's magic
figure 8
Turkish
alternating long tail (for colors)

Ok...I know I know more than that, mostly variations, but it's like naming all the dwarfs...hard to do on the fly (well, I can do the dwarfs, probably...Doc, Sleepy, Sneezy, Dopey, Grumpy, Happy, Bashful...they are easier, if you remember there are two without a y!).

Ok, I guess that means I have to get back to my mending.

In my next life, I'm not telling anyone I know how to sew.

Tuesday, April 13, 2010

I went for a couple of bike rides on the Cape this weekend. I only had my iPhone with me, so the pictures aren't great, and, even then, it was overcast while I was riding on Sunday (didn't think to take any pictures when it was beautiful on Saturday).

IMG_0099
Water from the dock at the end of Barlow's Landing.

IMG_0101
I was inexplicably fascinated with looking at salt marshes this weekend. I just loved them all, and there are lots of them around Wing's neck!

IMG_0105

This tree made me very happy. I even turned around at the bottom of the hill and rode back up to take a photo of it!

IMG_0112

If it were a bit warmer, this would be a lovely quiet place to sit and knit. It was at the end of one of the little dirt roads off the road that forks with Wing's Neck (what, you want me to remember street names? Dream on!).

IMG_0118
More marshes. I love the marshes!

IMG_0121

Pretty soon this gardern will be lovely...there are a few flowers already. See the water? I like water.

IMG_0126
This is the best place in the entire world to knit. There is a nice seawall to sit on, as well as the beach and rocks and dock. Not too wavy, but some. Lots of small sail boats to watch, as well as kayaks. The sun finally came out, giving me a decent photo!

Wednesday, April 7, 2010

We have a hexagon!

Well...it looks promising, doesn't it?
DSC01987

This is the first of 6 hexagons of flowers! It's done.

There are some things about this that are a pain...turns out that the coral glows under my full spectrum embroidery light when I try to take a photo. I didn't try a flash, I assume it'd be worse. Maybe I can get an outdoor shot tomorrow.

DSC01990

This one looks a bit better, the angle seems to help, and you can see how 3-D these flowers are.

DSC01984

This one is my favorite...well, it's better with leaves, but it's cute! And the petals are all curly.
This is also the one with the truest color. This blue on my monitor is the sky blue of the silk background, as well as the right, bright green, and pink.

DSC01982

This shot of the back of the embroidery shows the part of silk ribbon embroidery that is a pain...you have to sew down all the foolish little tails. It is slow and frustrating, and must be done carefully!

DSC01983

This is the front of that same bit. I later went over the petals to make them bigger and poofier.

DSC01992

Hmmm....I do like how this one turned out, too...with the bright coral flowers, and their dark leaves. I was choosing leaf colors, I had 3 greens, and decided that the neat variegated darker green with brown was just not going to work, and I wasn't going to use it at all. Then after I put leaves on a few flowers, I realized that neither the sedate pale green, nor the bright green was going to work for this flower. I ended up being able to use that green after all!

DSC01994

I like this combo, too...they look sweet together. Ok, I guess I like these flowers. Perhaps that is why I chose this pattern? Of course, the pattern in the magazine bears almost no resemblance to my flowers! I'm totally messing with the colors. The mag had representational colors and names for the flowers. Mine are pure fantasy, although I'm keeping the basic stem shapes and a smidge of petal shapes, mostly for balance. The colors are what I liked at the store, and nothing else!

There are a lot of french knots in this. I can't remember the last time I needed to make a French knot, and the centers of all the flowers have them, and that one flower (was it supposed to be a strawberry? Mine isn't) is just loaded with them!

Well, I got the first batch of flowers done, took about a day and a half, and I have 5 more to do. I'm getting faster, of course, and I'm learning what color goes where, so I won't have to spend quite so much time working that out tomorrow. I have the next batch sketched and labeled, and I even did a bit of stem stitching, so I'm good to start in the morning.

Sunday, April 4, 2010

The Boring Set Up

Yay! We are good to go! Well, except for the embroidery thread. I have all the silks, but I need some floss.

I have my frame set, the stand ready.

DSC01978

My cute little caddy. It works perfectly, otherwise I tend to loose my threads. And my clamps. You need clamps for embroidery, don't you? Well, I do. The magazine has the directions for the funkier flowers, which I'll change completely. These flowers will not be realistic. They are Colleen-Flowers! I have pretty colors for them. There is a variegated magenta and pinky lavender and purple. I have solids in lavender, blues, and corals. Then there are some plain and some variegated greens. They all look lovely on the pale blue silk!

DSC01980

Here you can see how I hold the little tote-caddy to the frame.

DSC01981

And the slate frame is clamped to the big stand. You can see the clamp in the back.

Boring, huh? This step of setting up embroidery always takes me forever...and it's very very boring. But, well, you can't do the embroidery without setting it up...so I figure I might as well do it all tonight, because I can't start until I get that thread, and today all the needlework stores are closed. I'd planned to go the floss stitching after I did the silk ribbon, but finally decided I needed to swap the order. So I can't wait to choose colors until I stitch, gotta do it first...so on my way home from meeting the surgeon who will, I hope, get rid of my torn meniscus (oh, my knee HURTS! Complain, fret, whine and groan), I will stop at a needlework store, and then be ready to go.

Saturday, April 3, 2010

HAH!

Ok, I did it. I'm pleased. I like my fancy slate frames...they work great. But it is a nuisance to lace them in. Then you have to cut the lacings, reroll the ends, and repeg it, and then relace it. Hate that last step!

Here are the steps:


DSC01969

I made a bit of a template.

DSC01971

I sewed casing strips to the top and bottom of my fabric and marked it from the template.


DSC01976

Sewed the embroidery fabric to the side slate pieces.

DSC01973

Rolled up up and put in the top and bottom sliding frame pieces. Then I stretched them out and pegged it, to make it taught.

This works well, but you really need it stretched vertically as well...which is where one usually laces it, like they did with the Plimoth project, you can see the lacing on the side, here:

DSC01702

Too frustrating, given that I'll be moving it a few times, and I don't want to leave it under tension, because of the 3-D ribbon.

DSC01974

So I threaded dowels through my casings, then used binder clips, tied to string, and hood string clips to hold the strings under tension! It's quick and easy to move those, and tighten them back up!

DSC01975

See? Much easier! I feel clever! Let's see how it works....on to the embroidery!

Friday, April 2, 2010

Tattoo of the kids

There is a bit of shine, and it’s still a bit bloody in this shot (I’ve since given it the soap wash and lube, and it’s wrapped up for it’s first night, as per instructions…..
DSC01961

This tattoo is of my kids...Teddy is the tree, Harry the swing, Beth is the butterfly, and Wendy is the flower.

I absolutely love it. Sharon is the best!!!!! I went to Juli Moon Studios in Lynn, Massachusetts. I highly recommend them, I hope someone here goes and gives them the business, I was so pleased!

Sharon listened to me, drew up what I asked for, tweaked it based on her own taste, keeping in my the things I said (I had lots of things like “well, this or maybe that”, because I wanted the artist to be able to do what worked, without getting bogged down in what I said, since I know that what you say you want isn’t always what you would choose, when you see it for real!). We discussed placement of the butterfly, back and forth, and she ended up with it on the branch, having expected to prefer it flying. I like it there…makes the whole thing less busy and more graceful.

I was on about size and prettiness, so the tree ended up slender and graceful, in a way that it never occurred to me to request. But had I known, I would have. It’s huge, but I was expecting it to be shorter and wider, until she handed me the sketch…and taller and narrower is MUCH more elegant! She’s good…she has lovely taste. Basically, she listened to me, the whole time, and read me accurately. My dd took one look at it, and said when she gets her first tattoo, she WILL go to Sharon! And txted off a photo to her bf, because he wants a tree of life (among other things) and may prefer to go to her, too. And she gave me the whole run down on what is required on safe tattooing (you won’t get anything from her except a tattoo), and how she treats everyone as if they have something nasty, then all are safe. She has a tattoo chair that is sort of like a dentist chair, with two separate leg rests, that are adjustable, back, head rest with a hole in it, the works. Very nice and sensible. She has a water mural painted aroudn the entire room, with a mermaid and fish (some big hand painted ones, and some are colorful decals….great overall effect), the ceiling tiles are sparkly fabric colored, and there are colored glass globes hanging….it’s pretty in there. I loved it. Can you tell? Oh, and it did hurt. A lot. She was encouraging, and suggested when breaks would be good, and patiently let me take them as I needed. The forms included all the info possible, and you had to initial each, including the info that you could stop whenever you wanted to. She was picky about making sure that the stencil placement was just where I wanted it, and offered her opinion as well. We all agreed when it was right. She said she’d MUCH rather I griped AT her than about her, later!


photo-11 copy

photo-10 copy
See, my leg is doing fine, here. There is no redness to speak of, yet. This part is very painful...the fine lines hurt the most!

photo-7 copy

This is the first break, this much took about 40-45 minutes. All the outline is done, the worst part!


photo-5

After a break...it's over half done. Some color is in.
As time goes by, and more drawing/injecting of ink, my skin got pretty red!

photo-3


photo-2 copy

My skin is pretty unhappy, by now! Sharon kept putting on vaseline...she had to wipe off the blood and excess ink, over and over, and you really need the vaseline to protect your skin from those paper towels ;-) But tomorrow the redness will fade a lot, and the colors will start to really shine.

photo-1 copy


All done!