Saturday, February 6, 2010

Valerie's Tallit

My niece's Bat Mitzvah went well. Her tallit was finished, pressed, and she seemed to love it...well, given the color, which she chose, that was a given!

DSC01877

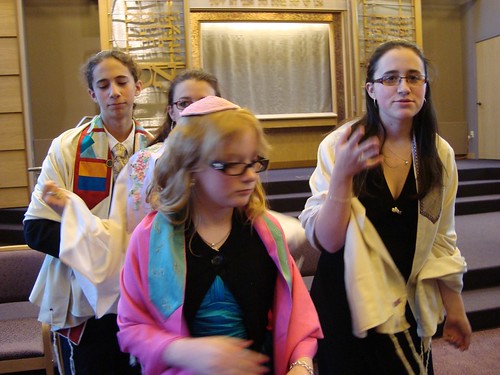
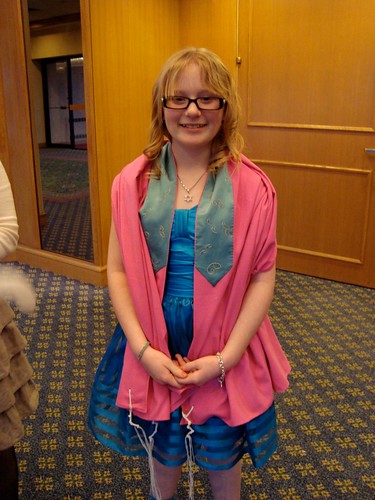
Isn't she just adorable? She got the dress in blue, not pink, because the tallit was hot pink, brighter than the photo shows. Good choice!

DSC01818
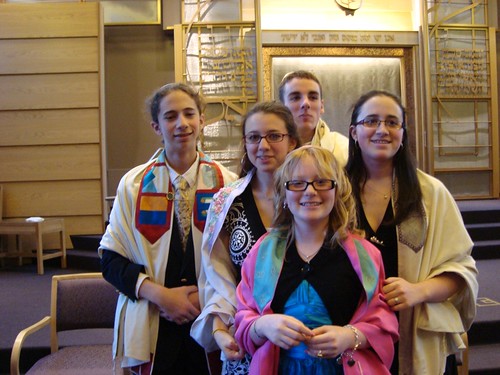
And here are my older 3 kids, Val, and her brother, all in the tallitot I made for them. Not the best view of my work, but I just love the group of them! They were all delightful, too...Jamie had an aliyah alone, my 3 had an aliyah together, and Wendy chanted.

Now, on the making of the tallit...

DSC01881
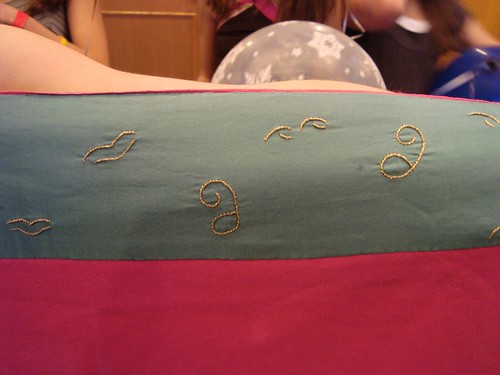
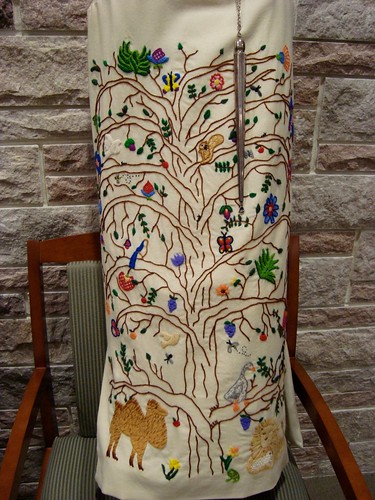
I decided that Valerie's had to be the Four Mamas from the Bible, to match the four corners required for a tallit. That was easy, Sarah, Rebecca, Leah, and Rachel. No problem...but I had to find symbols for them all!

Sarah, well, she laughed when God told her that she would have a baby in her old age...so the mouth is Sarah's laughter.

Rebecca...well she favored Jacob. Encouraging sibling rivalry may be what she's famous for, but not what I wanted on the tallit! Several people (on Ravelry and in person) suggested that she was generous, that she watered the camels. Val didn't want camels (too bad...there are some gorgeous camel embroidery patterns in Australian Inspirations magazine!), so I used the blue background for the water.

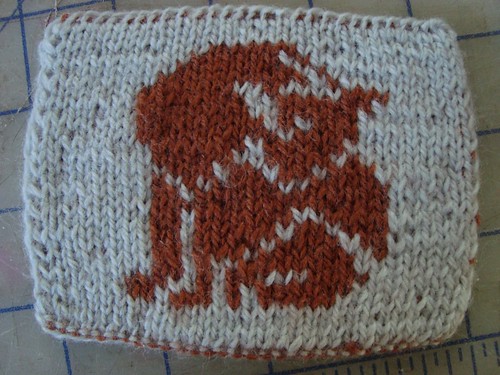
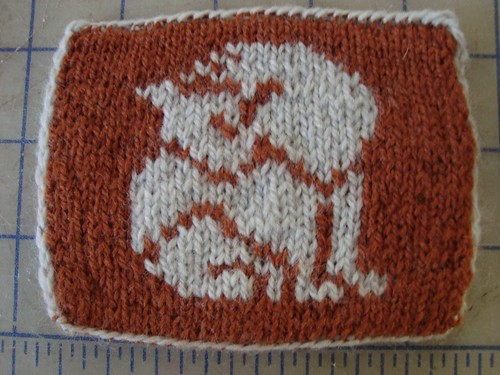
Leah, Jacob's first wife, had many children, so she is the mother and child symbol.

Rachel, Jacob's beloved, was beautiful, so the eyes are for her.

The gold thread is Kreinik gold metallic thread...not as bad to work with as I was expecting. I found it easier to leave a tail when I started end ended, and use regular sewing thread to tack the tails to the stitching underneath afterwards.

The pink silk noile was a find from my friend Sharon, from one of the online fabric stores...Sharon pointed it out to me, I called Val up and sent her the link, and she was very excited by the prospect. I think it works great for her! It's loud, but it suits her. I planned to use a changeable dark greyish blue taffeta for the water, but it had a nasty crease line in both directions, that just wouldn't work. So the local quilt shop came through with this teal. It's a cotton/silk really soft, slippery blend, but when sprayed with quilter ironing sizing it behaves. Water spots it badly, but evens out once rinsed.

DSC01880

When I was tying the tzittzit, I realized that I had figured out how to do them consistently, so that the spirals started and stopped in exactly the same place, as the instructions require, but never explain how to do. The commercially tied tzittzit don't necessarily get this right, either. So, I took pictures!

DSC01804
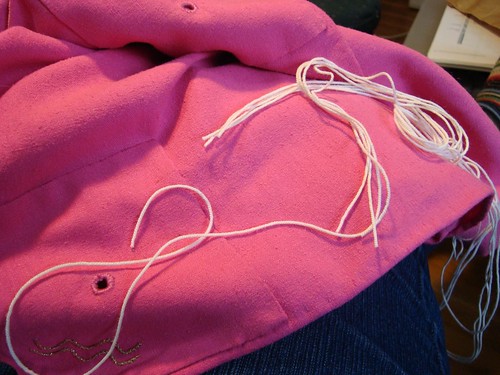
Here are the 3 cords plus the longer shamesh.

DSC01805
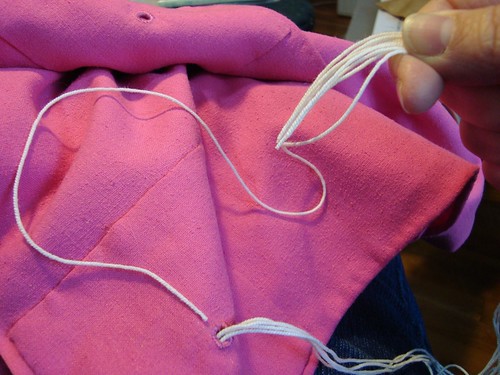
The cords go through the hole, and the 7 ends get evened up, with the shamesh hanging longer. The shamesh was put through the hole to the inside, so it will always wind up on the bottom, when I'm done with each double knot (granny knot).

DSC01806
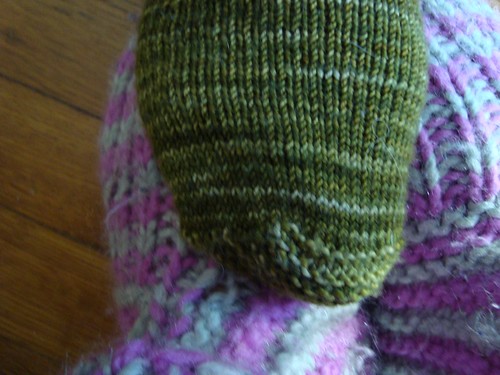
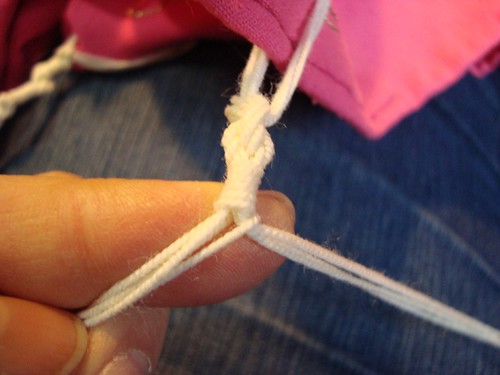
The granny knot tied, pretty straight forward so far. But this next bit is the trick: See the shamesh? It's on the bottom half. I ALWAYS "fair up" my knots so that it is in the center of the clump of threads, and pull it towards the front.


DSC01808

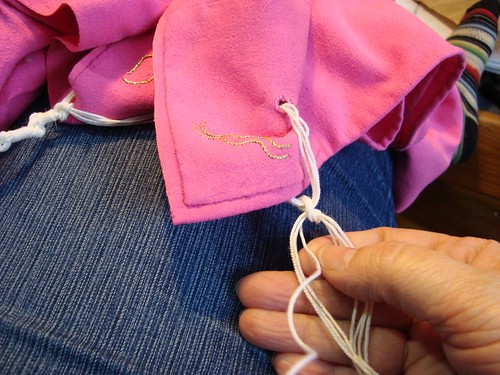
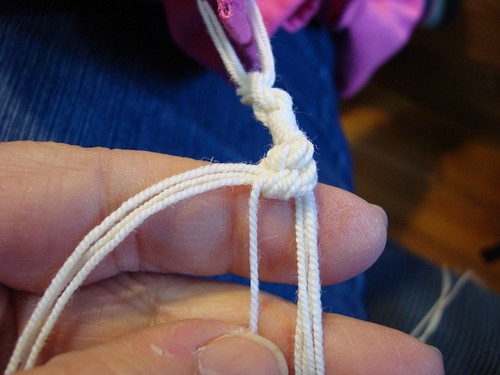
Now, as you pass the shamesh around to the left, then behind the stands, you can wind it the prescribed 7 times, and you end with it on top. I keep hold of the strands the whole time, to keep them neat and taught. I toss the shamesh to the left, then reach underneath to grab it and bring it back to the right and top. Divide the strands into two sections, 4 on the right, 3 on the left.

DSC01810

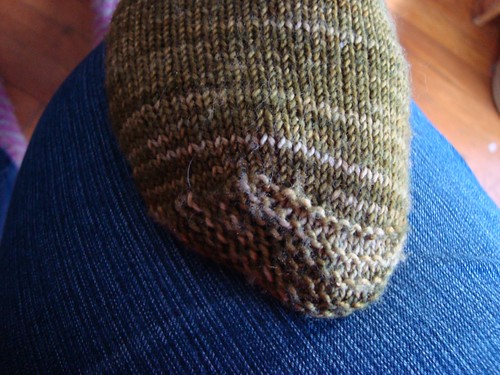
Add the shamesh to the group on the left, holding it towards the center of that group.

DSC01811
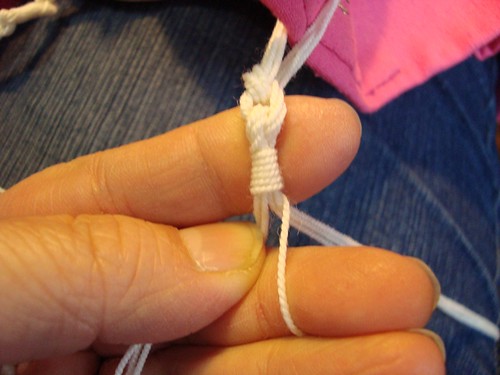
After that last double knot, keeping the shamesh towards the center, you start the next spirals.

DSC01812

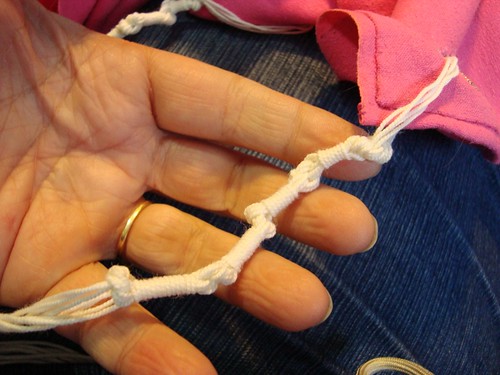
It takes me 15-20 minutes to tie one corner of tzittzit.


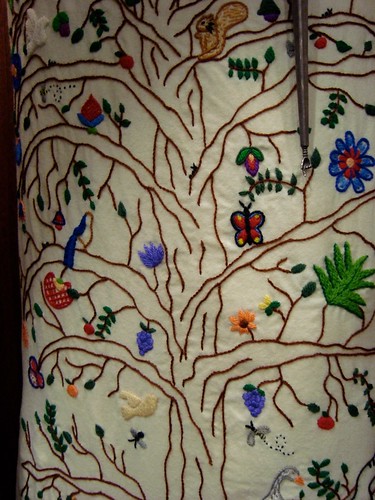
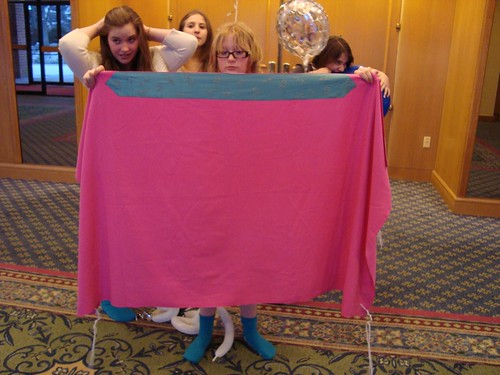
Lastly, I'm not sure why, but I love this shot. You can see Beth's flowers on hers better, anyway.
DSC01824

Sunday, January 31, 2010

Heart baby slippers

I needed something quick, easy, colorful, and fun, that I could finish really fast...so, despite not having anyone I can think of with a newborn, I made these, anyway, from The SockPixie

DSC01882

They start with a modified heart, from Elizabeth Zimmermann. I made the heart hat years ago, and I liked it...so I dug out some yarn, leftovers from Jesse's Steggie (he doesn't seem to wear it much, it's adorable, though...Steggie, from Knitty.com), and added in the Fruit Loops colored yarn I couldn't resist when I bought Jessie's yarn, it's all Encore washable acrylic/nylon worsted...there is enough for a tiny sweater or two, so I'll make something to go with the booties...maybe a Feb baby sweater...

The pattern just has the booties, no closure. Since I know just how long they'll stay on baby feet, I added double strand finger looped cord, the way Jeannette, the Waldorf handwork teacher, taught us. I sewed the center back of the cord in place, so they can't get lost or tangled.

They really came out cute!

Friday, December 11, 2009

Square Sock toes

DSC01720
This sock toe is great. It's really easy, and it warps to fit any sort of foot. It can be used with most toe up sock patterns....just don't do the toe they suggest, do this one.

Figure out how many stitches you want the foot to be (look in your pattern, or do the math, whatever).

Divide that number by 4. Let's name this number....Alfred (if it is not even, just round it down, and increase those 1-3 sts in the last row).

Cast on Alfred stitches with any provisional cast on you feel like. I like the invisible cast on, here, at http://www.knittinghelp.com/videos/cast-on (scroll down), but any will do.

Work in garter stitch, knitting each row, until you have Alfred ridges on both sides (this will be Alfred times 2 number of rows).

Pick up Alfred stitches along the next side....if you have two circs, just pick up sts, one per ridge, with the needle tip with the yarn tail hanging from it. Pick one spot at the very edge of the ridge, to pick the st through, and use that same place in each ridge, to make it smooth and even. If you need to, finagle the last sts/ridge just a bit. If you are using dpns, then use a second needle to pick up these sts.

Now take out the waste yarn, putting the new, live sts from the cast on onto another circ or dpn.

Pick up sts along the last side, same as the 2nd side, onto that second circ or a 4th dpn.

Count your sts, making sure you have the required number for your pattern. Each circ should have 1/2 (twice Alfred), each dpn should have Alfred. If you had to round down to get Alfred, now increase to match your pattern and you knit the next row, and put them on your needles as the pattern requires. Continue with your pattern. This toe is a bit shallower than many short row toes, so you may need a few more rows before the ball of the foot. Most patterns measure from the tip of the toe to judge when it's time to start the heel, so changing the toe works for most patterns.

The points of the square will point up the sides, center top and center bottom of your foot.

DSC01721

Tuesday, December 8, 2009

Embroidery

It's about time I documented the embroidery I did for my synagogue, Congregation Kerem Shalom.

DSC01677

Years ago, our synagogue got a new Torah....an old new Torah. It was originally in a synagogue in Czechoslovakia. The Nazis murdered all the Jews in that town, and stole the valuables. The Torah was tattooed, cataloged, and placed in storage, to be part of a display in a museum of an extinct race. Ugh.
DSC01688
Here are the red letters the Nazis painted on the rollers. They used to be brighter, but handling has rubbed much of it off. The Torah wasn't well cared for under the Nazis, but it has had some conservation, although I wish it could have some more.

There are many Torahs like this, that were rescued and placed in synagogues for safe keeping. Here is more information.

Sixteen years ago, I was asked to make a cover for this Torah. I drew a tree of life, and embroidered it in wool on wool fabric and lined it in cotton. I kept the stitches simple, it's mostly outline stitch, with long and short stitch, satin stitch, couching, and some simple fillers.


DSC01678
I loved the camel, he was fun!

DSC01680
I really enjoyed the colors, and who could resist adding a lion and lamb to a Tree of Life? As is obvious, I had fun with the animals...when you aren't restricted by reality, you can put a goose into the tree with the seal!


DSC01692
The metal pointer is a yod, used to keep your place when chanting Torah, so that your finger oils don't damage the ink. They are usually decorative, as well as functional, and hang from the rollers, looking pretty, until the scroll is undressed, opened up and read.

DSC01689

DSC01686
Here is a page of the Torah

DSC01687
And here you can see it rolled up, ready to be dressed.

I did much of the embroidery with my then 1 yr old daughter strapped to my back! At her Bat Mitzvah, she carried this Torah around the sanctuary in the traditional processional, and then chanted from it. It's still part of Jewish life cycles, despite its history!

Tuesday, November 10, 2009

Double Knitting!

I'm learning double knitting, in yet a new way! I've done plenty of it like Beverly Royce wrote about, in the OOP Notes on Double Knitting. Very useful for skinny tubes, but I don't bother with it otherwise. Right now, I'm doing double knitting colorwork, M'lou style! Double Knitting: Reversible Two-Color Designs I'm really enjoying it. I want to do a cap, but I needed a gauge swatch, so, since Abe has refinished my old cribbage table, it needs some coasters...so here is the first.
DSC01574
the front
DSC01573
and the back.

I'm noticing a lot of unevenness...I think that many of the spots are from twisting the yarns together on the inside. The top bit has much less of this, and that was when I figured out how to make the yarns stay in the same orientation, and actually knit faster!

This is a really fun technique. You have double the number of stitches, and have to pass the yarn forward and back between each stitch, as you knit the stitches for the front, then purl the stitches for the back, working each pair, one in each color. SInce you use each color once for each pair of stitches, the tension problems I usually have when trying to carry two colors in one hand don't happen. So I'm doing this in Contental style knitting, because it's easier to pass the yarn forward between stitches.

I'm finding this hard to put down...I keep wanting to see what it'll look like when I get just one more row done. You can't see the pattern on the row on the needles, because it's doubled, with the reverse video interspersed, so you need to knit another row to see the last row!

I'm using sock yarn now, this is Knitpicks Palate. The cap will be in Regia.

I'm still chugging away on Ellen's sweater...but I've got 5 inches of stockinette to do, and I'm about an inch into it. It's in my bag, for my "out and about" knitting.

Thursday, November 5, 2009

Ribbing Woes

I'm using Manos Del Uruguay. It's a silk/wool blend. Singles....LOVELY yummy scrunchy crunchy silky yarn.

This is what I want:
DSC01568

But this is what I have got:
DSC01571


What is the difference? Well the pattern yarn is Posh, a cashmere silk mix. Notice the lack of wool. Cashmere and silk ribbing is pretty flat, with very little sproing to it...it just doesn't draw up. If you are making a sweater out of that, that lack of drawing up may make you nuts! So the pattern has these really wide ribbed bands, that don't draw up, mostly for looks, not for holding in power (the pattern photos aren't online. sigh). If I want mine to match, I need my bands to not draw in. As you can see, they are drawing in a LOT. Lovely snug ribbing....just not what I want this time. So in order to get rid of the drawing in I'm trying using a huge needle. It is working, but the stitches are, of course, huge!

DSC01572

Of course, it looks like I'll have to just knit a few inches, and then see. What a nuisance. Relaxed this one is about 16 inches, while the last was only 9. So we are getting there, except for the stitch size/neatness. I'll probably have to compromise with one size smaller needle and some blocking, but I'd rather not depend on the blocking for this one, so I'm willing to risk another 4 inches of frogging...but at least the larger stitches mean fewer rows!


Monday, November 2, 2009

I gotta crow

I'm feeling quite clever.

I just finished my Icelandic Neck Shawl, done as a full size shawl, from the Schoolhouse Press Shawlalong. It's blocking, and still wet....that unspun Icelandic yarn holds a lot of water!

The shawl was pretty easy, except I didn't measure, and decided I wanted it bigger after I finished the base triangle, but before I added the border, so I added a bunch of borders, first, then the pattern's border.

The pattern border is ruffled....this is where the cleverness comes in...see how I blocked it!
DSC01558

DSC01561

DSC01562

I figured, since the ruffle is 3-D, and I can't fit it all next to itself, down on the table, I might as well make it 3-D! I had already laced some crochet cotton through all the loops along the edges, so stringing some blocking wires through the bases/indents of the scallops was easy.

It is taking forever to dry, though!